

Sunday, November 1, 2015
Swallowtail Screen Card
Tuesday, October 6, 2015
Playing with Every Blessing


Sunday, October 4, 2015
JAI Challenge # 282

Sponging all the way


Wednesday, September 30, 2015
Peaceful Pines


Tuesday, September 29, 2015
Weekend Getaway


 Alison's swap was probably my favorite for the weekend. We again utilized the Christmas Greetings and Embellished Ornament Thinlets and the touch of sparkle was added with the Dazzling Diamonds Glimmer Paper along with Merry Moments DSP. Alison always manages to make us go 'WOW' with her swaps and the interactive element of this card didn't let us down.That gorgeous red foil ornament is tucked away behind some clear acetate and is simply pulled up by the white bakers twine for a little extra WOW!
Philippa gave us another WOW with a very fun 'shaker card'. This time we got to play with the Snow Place Stamps and matching Snow Friends Dies.
 And last but certainly not least was Margaret's card. She veered away from the Christmas theme used the Woodland Textured Embossing Folder and Along the Branches Stamp Set to create this card with a Halloween feel. I made a few mistakes on mine but I really enjoyed all of the sponging and this is certainly something I would never have attempted on my own.
I love the crafty weekends with these girls. We all share our stuff so we get to play with the goodies we don't yet own. We end up going home with a new wish list a mile long and a sore stomach from all of the laughs we have. Thanks to Margaret for generously hosting the weekend. It was a blast!
Monday, September 28, 2015
What a little clean up can uncover...
 So after a 3 year blogging hiatus I thought I should start with a spruce up of my craft room and I came across a few images I had colored quite some time ago so I decided to card them up. I used a bunch of bits and pieces that I had lingering in my craft stash and here is what I came up with.
Boy! Blogger has really changed since I last used it, I am having trouble finding my way around I must say! Lol!
Anyway, until next time ...
Sunday, September 27, 2015
Blowing off the Dust
Yikes! More than three years since my last post! I will have to get creating and sharing again. It took me ages to even figure out how to log in to my blog, lol!
Sunday, August 26, 2012
Hello and maybe a little Goodbye
 I had actually made these cards a little while ago but have not had time to load them up. I have quite a few 'uninked' stamps and this set was one of them. With fading mojo I google imaged the set and found some lovely inspiration. Gotta love that!
 I say hello because of the stamp I used and maybe a little goodbye because my new study period starts again tomorrow and I know I will have very limited crafting let alone blogging time for the next twelve weeks :( How sad.
  The colours here are a little washed out but they are whisper white, elegant eggplant and witeria wonder.
Saturday, August 25, 2012
In the festive spirit
 I have been feeling a little festive lately, and I cant go past the 'Dasher' stamp when it comes to Christmas cards, he is just so beautiful. I also love making neutral Christmassy cards, they always look so fancy to me.
Wednesday, August 22, 2012
Christmas Stockings
 I got in the Christmas Spirit today and put together some Stocking Cards. The large stockings are cut with the die, and the little cards are made using the offcuts of cardstock from the big stocking and a punch. Cute huh?
Wednesday, July 25, 2012
Beautiful Girl & Her Birthday Bear
A little while ago I saw an idea in a crafty mag to create a rainbow of accents around a gorgeous picture. As soon as I saw that layout I had this in mind for my gorgeous photo of Ava, my niece, and her beautiful Birthday Bear, Delancy.

Ava has asked me to take her to build a bear for her last two birthdays. We build a bear, have some lunch, shop and hang out, it is so great to spend one on one time with her. This page will help me cherish these days forever.
Sunday, July 22, 2012
When in need of inspiration...
Last Friday night, I got together with a couple of girlfriends for a creative night. After much gossip, drooling over the catalogues, surfing the net etc, we realised it was 10pm and none of us had actually made anything! We decided to case a couple of cards from Teneale Williams Blog because it was way too late to come up with anything of our own, lol! These are what we made;

Friday, July 20, 2012
Stampin in Safety Beach
I can not believe the last time I posted was Christmas! It was also the last time I was creative :( But lucky for me, a good friend and fellow stamper, Margaret came to my rescue and organised a get together at her beach house. We had so many laughs, and lots and lots of creative time! It was a blast! I mostly spent my time scrapping but did manage to squeeze in a couple of cards. These two cards were a case of a creation made by Alison Wade. She is a clever girl! I changed up the colours a bit but the overall card is much the same.

The next idea came from a new friend Monica's 10 year old daughter, Bree. She was working on a card that gave me the idea for these two cards. They are very simple, but cute.

I also took full advantage of using other peoples stamp sets, thanks Amanda for lending me your Sparkly and bright set :)

I came up with the following cards with images that I have stamped and inked over the past few years and never done anything with.


And here is a snap of us as we were getting ready to leave. We are looking a little bit worse for wear after 48 hours of crafting, laughing, eating way too much and very little sleep. Thank you so much Margaret for sharing your home with us, we had a ball xx

Tuesday, December 27, 2011
Merry Christmas
I have not fallen off the face of the earth, just the craft world, and hopefully only for a bit?? With full time Motherhood, full time study and part time work I did not get a chance to share my Christmas message with cards this year :( I do hope your Christmas was Merry and Bright, and that 2012 will bring many crafty wishes come true xx
Wednesday, September 14, 2011
Spring has Sprung
On Monday I played hooky from my studies and had a lesson on how to colour using copic markers with my friend Phil. I am very proud of my first attempt, so I decided to play along with the challenge at Mad for Markers this week which is all about spring.  I also got the chance to use one of the new stampin up in colours, Island Indigo, which looks gorgeous alongside Poppy Parade. Anyway, hope you like my first attempt at colouring with copics, it was a lovely way to spend a Monday! Thanks Phil xx
 I also got the chance to use one of the new stampin up in colours, Island Indigo, which looks gorgeous alongside Poppy Parade. Anyway, hope you like my first attempt at colouring with copics, it was a lovely way to spend a Monday! Thanks Phil xx
Monday, August 29, 2011
That might be it for a while
Well, yet another study period started today and with it, lots of reading and assessment so I will sadly have very little creative time over the next 12 weeks :( Here are a couple of girly creations I have made lately.
 I spied this punch art castle over on Madonna Dunn's blog a while back, and hear that Pat Carr was the original creator. I just love it, and so do my girls. I made it for Miss Tara who was six this year, and I am sure she loved it too. You cant see it in the photo, but I covered the castle in swirly shimmer paint it is quite shiny.
My next card was for another six year old girl, Miss Michaela. I just love rich razzleberry & Melon Mambo together, such a yummy color combo.
 My pom pom ribbon looks a bit dodgy, does anyone have any secrets for adhering it perfectly?
And my last card is a case of something I have seen around the traps (no idea where, so sorry), and I think I will use it for an older girl, maybe a tween? I used the extreme elements stamp set with wild wasabi, melon mambo, perfect plum, rich razzleberry and blushing bride.
 Oh well, thats it for a while, I am off to hit the books now :(
Sunday, August 28, 2011
New Toys
I spied this colour combo of Poppy Parade and Calypso Coral here on Christine Blain's blog and thought to give it a go. 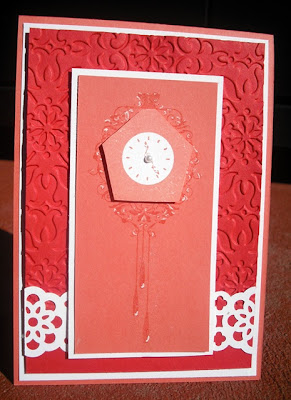 It is certainly not a combo I would think up on my own but I don't mind it together, it is bright and fun. I have coupled it with the new Forever Young stamp set, which in my mind goes perfectly with earthy neutral tones, not these bright babies, so it is definitely out of the box for me. I finished the image off with a couple of highlights using the white gel pen, and of course, the new ribbon border punch! We are having some fabulous sunny weather here this weekend, so I intend to get myself out in the garden to enjoy it. What are you up to this fine Sunday morning?
 It is certainly not a combo I would think up on my own but I don't mind it together, it is bright and fun. I have coupled it with the new Forever Young stamp set, which in my mind goes perfectly with earthy neutral tones, not these bright babies, so it is definitely out of the box for me. I finished the image off with a couple of highlights using the white gel pen, and of course, the new ribbon border punch! We are having some fabulous sunny weather here this weekend, so I intend to get myself out in the garden to enjoy it. What are you up to this fine Sunday morning?
Friday, August 26, 2011
Bubble Queen
I made this card about a month ago for a friends 40th birthday. It has been a very long time since I wiped away the cobwebs from my Bubble Queen stamp set, and I think I have to say that it is my all time favourite set. Since the last time I used it, Stampin Up have introduced shimmer paint to their line, the perfect tool to add a little shine to the bubbles.
 It was also fun to do some colouring in too. I find colouring very therapeutic, I really should do it more often.
 Since the last time I used it, Stampin Up have introduced shimmer paint to their line, the perfect tool to add a little shine to the bubbles.
Sunday, August 21, 2011
Christmas Craft
On Friday night, I decided to get my Christmas cards started, I would usually have created about 20 or so by now, but because I am not doing classes at the moment, I have nada! The first one is using one of my fav colour combos, crumb cake, black and vanilla.
 I have used the Welcome Christmas set, and the very fancy lace ribbon border punch, due for release in next months new catalogue. I used heat and stick powder, and diamond glitter to dazzle the whole image up.
On this next card, I got my new Merry & Type stamp set all inky in my favourite Christmas colour combo, old olive and cherry cobbler.
 As you can see, the ribbon lace border punch got a work out again (I am sure this punch will feature on many of my cards in the future!)
And my last card used the same glitter technique, but this time using the ever popular lovely as a tree stamp set. Good to see this one is still in the catalogue, I don't think it will ever retire.
 Colours are baja breeze and night of navy. I also added Mr Dasher to the corner and the sentiment is from Contempo Christmas. Here is the group (oops, baja card is fading into the baja wall of my craft room, lol!):
 Not a bad start to my Christmas card collection, only about a hundred to go, lol!
Friday, August 19, 2011
What Happens at Stamp Camp...
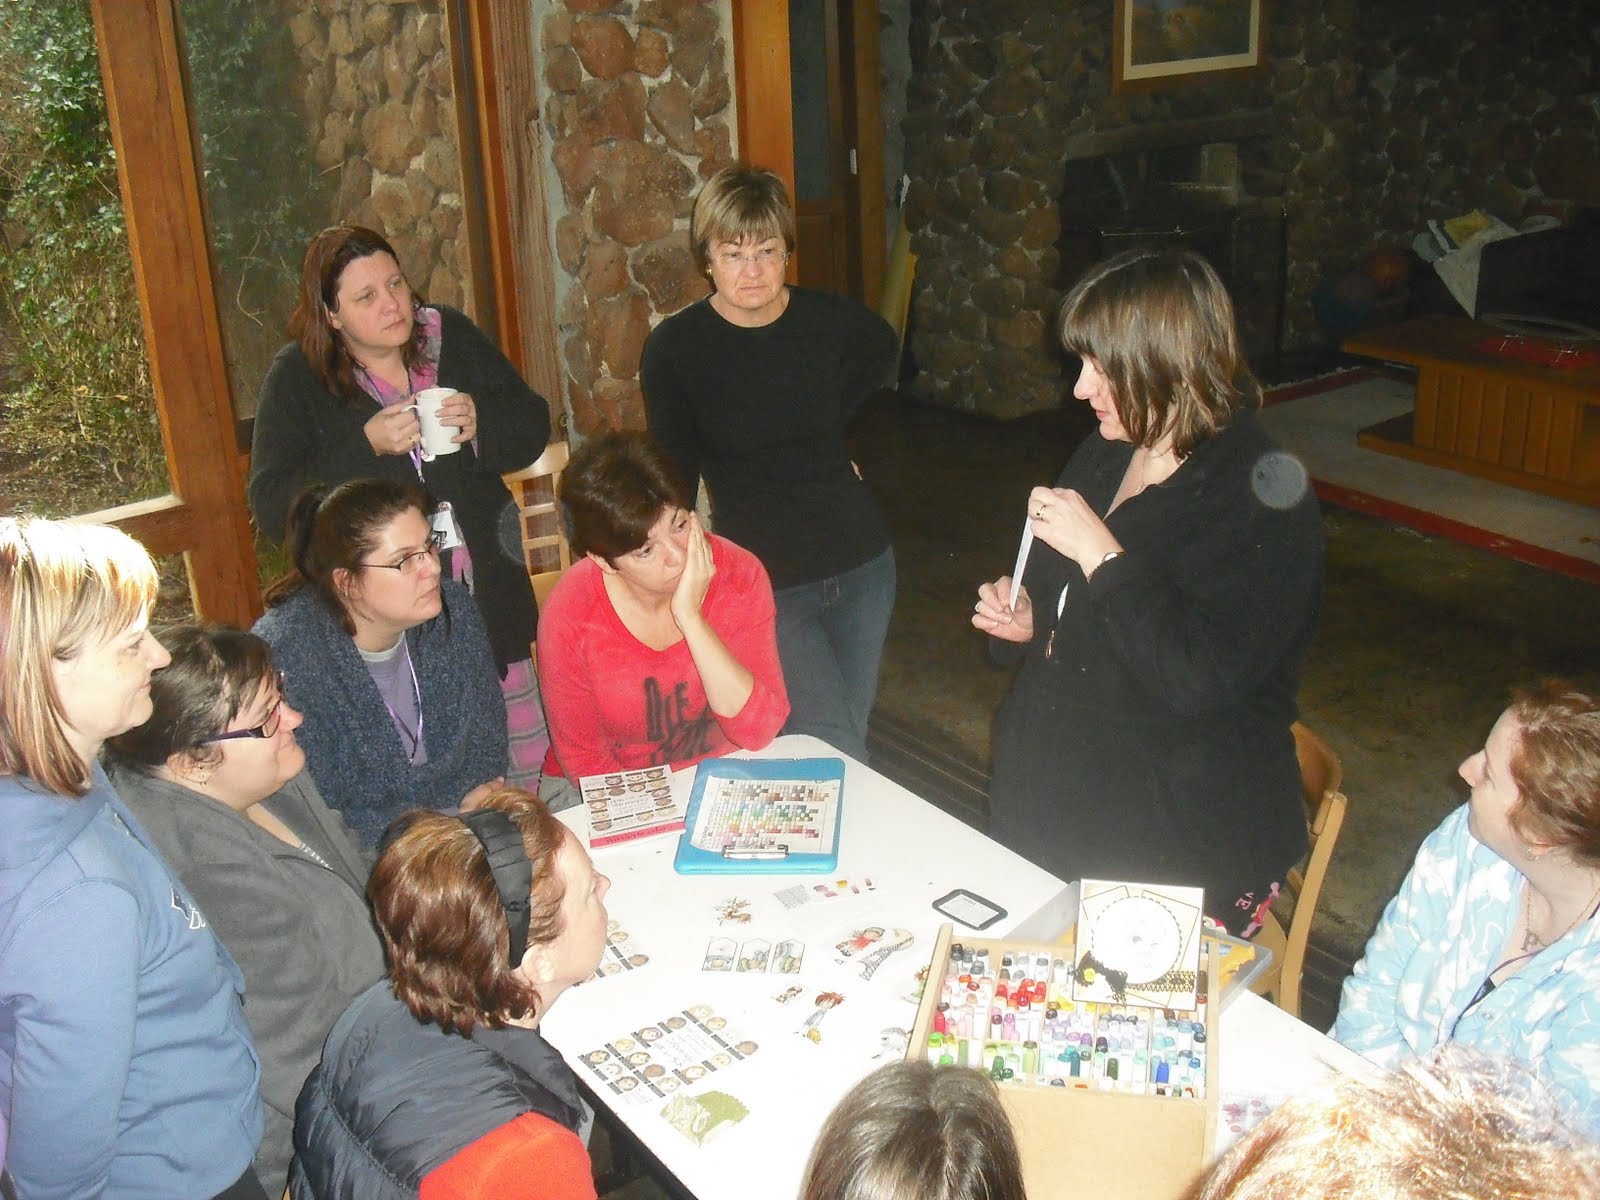
A couple of weekends ago, I was lucky enough to get away for the weekend to attend STAMP CAMP 2011! We had so much fun, however, very little stamping took place on my table! I spent most of my time chit chatting! Lucky for the shoe box swap or I wouldn't have gotten anything done! Anyway, thought it might be fun to share some pics of our adventures.
 Phil and I thought it would be so funny to take a photo of this because we believe us scrappers will photograph absolutely anything, but now we have a funny story to go with it. The place we stay is a little tricky to find, so we thought we would pave the way with pink balloons to make it easier for everyone! It did make it easier for people to find, but sadly one children's party entertainer (a young man dressed as Captain Jack Sparrow) chose to follow the balloons to our party (25 women in PJ's) rather than the kids party he was supposed to be at.
We had a door prize of course, a punched flower taped to the bottom of a chair, sadly, nobody sat in the designated chair so at the last minute, Phil & I had to think of another way to give the prize away. Quickly we stuck it under one of our raspberry & white chocolate muffins that were made for dessert. You can imagine Nina's delight when she bit into hers and found she was the lucky winner of a stamp set!
 And every few hours alarm bells went off, that could only mean one thing...PRIZE PATROL! Each time the bells rang out we drew a card out of a hat, if the card matched the dsp in your lanyard you got to pick one of these cute little milk cartons with Hershy Kisses and a lucky number inside. Each number corresponded to a prize, all crafting goodies of course! Sarah, Kathryn & Yvonne were our first lucky winners!
 Here is Amanda, Kiley & Adele, also winners from one of the Saturday Prize Patrol :)
 Years ago, Phil and I got our hands on a a WOW presentation DVD from the US. It is a little out of date but it was fun to have on, and we picked up a few tricks too.
 This way we could pretend we were at convention too!
And with so much talent in the room, we had some wows of our own! We were lucky enough to get some tips for colouring with Copics from the ultimate talent Debbie P
 And Alison gave us some very handy ribbon tips and tricks, including how to tie the perfect bow!
 With all the stamping going on, we thought we might break it up a little and got our very own gym instructor in to give us a Zumba lesson. It was such a laugh! Zumba in pj's!
 Lucky me! Got to share my birthday with these fun chickies! And, Sarah made me a yummy cake, yummy cause it was chocolate, and yummy cause she put Edward on top!mmmmm
 And, speaking of cakes, check these out, this is stamping on cakes, how clever is that! These were made by the lovely Karen, who I believe won the prize for most creative creation of the weekend!
 Before I got a chance to take photos of all of the other terrific creations made during the weekend my battery died :( Ahhh, you will just have to trust me that there were some amazing creations.
Philippa and I had so much fun organising this weekend, it was a huge job at a very busy time of year. Thank you for all of your efforts Phil, I had a ball sharing this experience with you, and thanks to all of the girls who came along, it was so lovely catching up with old friends and making new ones:) And an extra special thank you to the beautiful ladies who made my birthday so very special, spoiling me with gifts, cake and a sprakly feather boa xx
Subscribe to:
Posts (Atom)

